


Step into the enchanting world of baking and bring a touch of royalty to your kitchen with a DIY Princess Cake! Whether you’re celebrating a special occasion or simply indulging your inner princess, this delightful dessert is sure to dazzle both young and old alike. Join us on a magical journey as we guide you through creating your very own majestic masterpiece fit for any royal celebration. Let’s sprinkle some fairy tale magic into your baking adventure!
Tools and Ingredients Needed
When it comes to creating a Princess Cake fit for royalty, having the right tools and ingredients is key. To start with, you’ll need basic baking equipment like mixing bowls, measuring cups, and cake pans. Make sure you have a stand mixer or hand mixer for easy mixing.
For the cake layers, gather flour, sugar, eggs, butter, milk, baking powder – all-purpose ingredients that form the base of your masterpiece. Don’t forget vanilla extract for that extra touch of flavor!
To create the perfect frosting to adorn your cake with swirls fit for a princess’s gown, stock up on powdered sugar (also known as icing sugar), butter cream cheese or heavy whipping cream. And let’s not overlook food coloring to bring your creation to life in vibrant hues.
Lastly don’t miss out on edible decorations such as sprinkles or edible pearls – these will add that final magical touch to your princess-inspired confection!
Step-by-Step Instructions for Making the Cake Layers
To begin crafting your princess cake, the first step is to prepare the cake layers. Start by preheating your oven and greasing your round cake pans. Next, gather all the ingredients needed for the cake batter – flour, sugar, baking powder, salt, butter, eggs, milk, and vanilla extract.
In a mixing bowl, cream together the butter and sugar until light and fluffy. Add in the eggs one at a time, beating well after each addition. Gradually add in the dry ingredients alternately with the milk and vanilla extract.
Once the batter is smooth and well combined, divide it evenly between your prepared cake pans. Smooth out the tops with a spatula to ensure even baking. Bake in the preheated oven until a toothpick inserted into the center comes out clean.
Allow the cakes to cool completely before removing them from their pans. Now you have perfectly baked cake layers ready to be assembled into a delightful princess creation!
Creating the Perfect Frosting
Crafting the perfect frosting for your princess cake is key to achieving that enchanting and delightful finish. Start by whipping up a smooth buttercream base, using unsalted butter at room temperature for optimal creaminess. Gradually add sifted powdered sugar and a splash of vanilla extract, blending until light and fluffy.
For a regal touch of color, incorporate a few drops of food coloring in soft pastel shades like pink or lavender. Mix well to achieve that dreamy hue fit for royalty. Adjust the consistency with milk or cream as needed to reach that ideal spreadable texture.
To elevate the flavor profile, consider adding a hint of almond extract or lemon zest for an extra layer of sophistication. Experiment with different flavors to suit your taste preferences and make your princess cake truly unique.
The secret ingredient? Patience! Take your time smoothing out the frosting evenly over each layer, ensuring a seamless finish worthy of any royal celebration.
Assembling and Decorating the Cake
Once your cake layers are baked and cooled, it’s time to assemble and decorate your princess cake. Begin by leveling off the tops of the cakes to create a flat surface for stacking. Place one layer on a serving plate and spread a generous amount of frosting over it.
Carefully stack the next layer on top, repeating this process until all layers are stacked. Now, apply a crumb coat around the entire cake – this thin layer of frosting helps seal in any loose crumbs before adding the final coat.
After chilling the cake for about 30 minutes to set the crumb coat, frost it with another layer of frosting using smooth strokes for a polished look. Get creative with decorating by piping rosettes or swirls on top, adding edible pearls or sprinkles for extra flair.
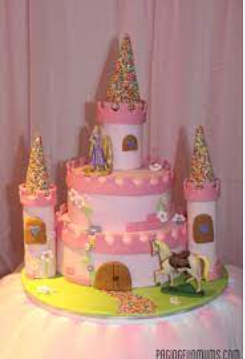
Finish off your masterpiece with a crown or tiara as a royal touch – voilà! Your stunning princess cake is ready to impress all at the party.
Tips for Personalizing Your Princess Cake
When it comes to personalizing your princess cake, the options are endless. One fun idea is to incorporate the birthday girl’s favorite colors into the frosting and decorations. Whether she loves pink, purple, or even a mix of pastel hues, let her personality shine through in every detail.
Another way to add a personalized touch is by choosing themed decorations that reflect the princess theme. Think about edible pearls for a royal touch or tiny tiaras made from fondant for an extra special flair.
Consider adding some sparkle with edible glitter or shimmer dust for that magical fairy tale finish. These little touches can elevate your princess cake from ordinary to extraordinary and make it truly fit for royalty.
Don’t forget about incorporating elements like sugar flowers, bows, or even small figurines that represent the birthday girl’s interests or hobbies. Remember, this cake is all about celebrating her uniqueness and making her feel like a true princess on her special day!
Enjoy Your Homemade Masterpiece
Now that you have followed our step-by-step guide on crafting a Princess Cake at home, it’s time to sit back and admire your delicious creation. Whether you’re making this cake for a special occasion or just as a fun baking project, the joy of seeing the final result is truly rewarding.
Remember, don’t be afraid to get creative with your decorations and personalize your Princess Cake to make it truly unique. The most important thing is to have fun in the process and enjoy every bite of your homemade masterpiece.
So go ahead, slice into that beautifully layered cake, savor each mouthful of fluffy sponge and creamy frosting, and bask in the satisfaction of knowing that you created something magical right in your own kitchen. Happy baking!


