


Get ready to spice up your culinary adventures with the fiery and flavorful chile serrano! Known for its bold kick and vibrant taste, this versatile pepper is a staple in Mexican cuisine and beyond. In this blog post, we’ll explore how to preserve chile serrano so you can enjoy its zesty goodness all year round. From canning to pickling and freezing, we’ve got you covered with step-by-step instructions to help you savor the heat of chile serrano whenever your taste buds crave it. Let’s dive in and unlock the secrets to preserving this beloved pepper!
Benefits of Preserving Chile Serrano
Preserving Chile Serrano comes with a range of benefits that go beyond just keeping this spicy pepper around for longer. One of the main advantages is having access to its vibrant flavor and heat all year round, even when it’s out of season. By preserving chile serrano, you can add a kick to your dishes whenever you want, without worrying about availability.
Another benefit is the cost-effectiveness of buying in bulk and preserving excess chiles. You can save money by purchasing larger quantities when they are in season or on sale, then storing them for later use. Plus, homemade preserved chiles often taste better than store-bought versions because you control the ingredients and flavors added during preservation.
Furthermore, preserving chile serrano allows you to experiment with different preservation methods like canning, pickling, or freezing. This versatility opens up a world of culinary possibilities as you explore new ways to incorporate these spicy peppers into your favorite recipes. So why not dive into the art of preserving chile serrano and elevate your culinary creations?
Necessary Equipment and Ingredients
When it comes to preserving chile serrano, having the right equipment and ingredients is essential. Here’s what you’ll need:
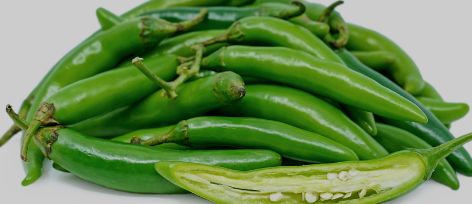
First off, gather your fresh chile serrano peppers, making sure they are ripe and free of any blemishes. You’ll also need vinegar, salt, sugar, water, mason jars with lids for canning or pickling, a large pot for boiling water bath canning method.
Other necessary items include a sharp knife for cutting the chiles and preparing them for preservation. A cutting board will come in handy too to keep your workspace clean and organized. Don’t forget about measuring spoons and cups to ensure you get the perfect balance of flavors in your preserved chiles.
Have some gloves on hand if you’re sensitive to spicy foods or want to avoid getting the pepper oils on your skin. With these basic tools and ingredients ready to go, you’ll be all set to start preserving your delicious chile serrano peppers!
Step 1: Cleaning and Preparing the Chiles
When it comes to preserving chile serrano, the first step is crucial: cleaning and preparing the chiles. Start by selecting fresh, firm chiles with vibrant green color for the best results.
Before handling the chiles, remember to protect your hands with gloves as their oils can cause irritation. Rinse the chiles under cold water and gently scrub them with a vegetable brush to remove any dirt or debris.
Next, carefully remove the stems of the chiles using a sharp knife. If you prefer milder heat, you can also deseed them at this stage. Slice or dice the prepared chiles according to your preference for storage.
Properly cleaned and prepared chiles ensure that your preserved products will be flavorful and free from any unwanted contaminants. So take your time during this step to set yourself up for successful preservation ahead!
Step 2: Choosing a Preservation Method
When it comes to preserving chile serrano, choosing the right preservation method is key. There are several options to consider based on your preference and intended use of the chiles.
One popular method is canning, which involves sealing the chiles in jars with a vinegar-based solution. This method helps maintain the flavor and texture of the chiles for an extended period.
Another option is pickling, where the chiles are submerged in a brine solution along with herbs and spices. Pickled chile serrano adds a tangy kick to dishes like tacos or sandwiches.
If you prefer a simpler approach, freezing can also be effective. By slicing or dicing the chiles before freezing them, you can easily incorporate them into recipes as needed.
Consider your storage space, time availability, and desired flavor profile when selecting a preservation method for your fresh chile serrano harvest.
Step 3: Canning Instructions
Once you’ve cleaned and prepared your chile serrano, it’s time to move on to the canning process. Canning is a great way to preserve the fresh flavor of these spicy peppers for an extended period. To start, make sure you have sterilized jars and lids ready for packing the chiles.
Fill each jar with the prepared chiles, leaving some space at the top. Next, pour hot brine or vinegar solution over the peppers until they are fully submerged in liquid. This step helps maintain their crispness and flavor during storage.
Secure the lids tightly on each jar before placing them in a large pot of boiling water for processing. Follow proper processing times based on your altitude to ensure safe preservation.
Once done, remove the jars carefully using tongs and let them cool before storing in a cool, dark place. Your canned chile serrano will be ready to add a zesty kick to your dishes whenever you crave that spicy heat!
Step 4: Pickling Instructions
Pickling is a fantastic way to preserve the vibrant flavor of chile serrano while adding a tangy twist. To start pickling your chiles, begin by slicing them into rings or leaving them whole if you prefer. Next, heat a mixture of vinegar, water, salt, and sugar until it boils. Place the chiles in sterilized jars along with garlic cloves or other desired spices.
Pour the hot vinegar mixture over the chiles in the jars, making sure they are completely submerged. Seal the jars tightly and let them cool before storing them in the refrigerator for at least a week to allow the flavors to meld together. Pickled chile serrano adds a zesty kick to sandwiches, salads, tacos – you name it! Get creative with how you use these tangy treats in your dishes for an extra burst of flavor every time!
Step 5: Freezing Instructions
Freezing is a simple and convenient way to preserve the vibrant flavor of Chile Serrano for later use. After cleaning and preparing the chiles, you can choose to freeze them whole or sliced, depending on your preference.
To freeze whole Chile Serrano peppers, start by washing and drying them thoroughly. Place the peppers in a single layer on a baking sheet lined with parchment paper and then transfer them to the freezer. Once frozen solid, transfer the peppers to a resealable plastic bag or airtight container for long-term storage.
If you prefer to slice your chiles before freezing, remove the stems and seeds first. Spread the slices out on a baking sheet in a single layer before freezing them. This method allows you to easily grab individual slices as needed without thawing an entire batch.
By following these freezing instructions, you can enjoy the heat of Chile Serrano all year round without losing its spicy kick!
Tips for Storing and Using Preserved Chile Serrano
When it comes to storing and using preserved Chile Serrano, there are a few tips that can help you make the most out of this flavorful ingredient. Always label your jars or containers with the date when you preserved the chiles. This way, you can keep track of their freshness and usage.
Additionally, store your preserved Chile Serrano in a cool, dark place away from direct sunlight. This will help maintain their flavor and quality for an extended period. When using them in recipes, remember that they pack quite a punch, so adjust the quantity based on your spice tolerance.
Get creative with how you incorporate preserved Chile Serrano into your dishes – whether it’s adding them to salsas, marinades, or even pickling them further for an extra zing. Experimenting with different recipes is key to discovering new ways to enjoy this versatile ingredient!
Summary
Preserving chile serrano is a fantastic way to ensure you have access to this versatile pepper all year round. Whether you choose canning, pickling, or freezing as your preservation method, following these step-by-step instructions will help you enjoy the flavor and heat of chile serrano in your favorite dishes whenever you want. By taking the time to preserve these spicy peppers properly, you’ll be adding a delicious kick to your meals for months to come. So go ahead and start preserving those chile serranos today!


